2/24/2009

Be a Kid--孩子气的提拉米苏


刚来美国的时候就觉得这里不难买到便宜的食物,可是城隍庙那种货色的小商品却贵得离谱。前几个月, Cupertino新开了一家连锁的日本杂货店总算弥补了我喜欢淘小东西的缺憾。周末去那里附近吃饭,只是随便逛一下厨房用品就不知不觉逛了一个多小时。淘了蛋糕烤盘、小纸杯、蛋糕撒糖粉纸……

最近为了搬家,打算把屯的2盒占地面积颇大的手指饼用掉。Tiramisu是我做的第一个真正的蛋糕,记得去年第一次做的时候,刚把蛋糕糊倒进模里,料理盆就被小罗抢去用手指刮着里面剩下的蛋糕糊吃。


去年蛋糕上装饰的是水果,这次正好用上刚买的撒糖粉纸。原想着咱也要来点优雅的图案啊,可是新买的4个图案翻来翻去,个个都是卡瓦伊内!小日本的东西哇,都很有一股子孩子气。


幼稚就幼稚吧!

好多年前不记得在哪里看到一篇文章写道“女中学生脸上的傻笑”。那个年代我也曾是他们中的一个,目空一切、心比天高,考试测验是大过天的烦恼。于是若干年后看到那一句,自以为深沉的我完全同意作者的描述。游走在现实社会中多年才发现,一个成年人,即使是笑也笑得不再如当初那么纯粹、简单。苦笑?假笑?言不由衷得笑?敷衍的笑?顾虑、担心、烦恼……于是反而觉得当时能够傻笑是多么如花的岁月?!

没有人可以拒绝长大,但是如果可以像一个孩子一样简单自在地生活也可以是一种生活方式。如果愿意,每个人都可以像宠惯孩子一样得宠惯我们自己。


Tiramisu 的食谱来自这里

Marscarphone Cheese 227g

蛋黄71g(约4个大鸡蛋)

白砂糖85g(减为50g)

Marsala/Kuhlua 90ml,另准备2tbsp混合咖啡用

Gelatin 7g

cream 240ml

espresso 200ml

1. 冷却咖啡待用。打发现奶油至七分发,置于冰箱冷藏备用。

2. Gelatin加2tbsp冰水,等充分吸收后隔水融,待用。在一个盆中混合蛋黄和糖,隔热水打发至蛋黄发白。

3. 蛋黄液中加入酒液充分搅拌后加入Gelatin溶液,拌匀。

4. 在七分发的鲜奶油中加入marscarphone cheese,用低速搅打均匀

5. 在芝士糊中慢慢加入蛋黄酒液,用低速搅拌均匀,此为做好的marscarphone慕斯糊。

6. 在冷却的咖啡里加入2tbsp酒液,将手指饼两边均匀沾上该咖啡酒液,铺一层于模底及模壁,倒入一半的慕斯糊,再铺一层沾上酒液的手指饼,然后倒入剩余的慕斯糊,置于冰箱冷藏过夜。

7. 次日将蛋糕小心脱模,撒上可可粉,碎黑巧克力或水果等装饰。

2/16/2009

5人行的西雅图情人节


说去西雅图欢度情人节,其实是“美其名曰”,事实上在Amy提醒我们之前,我们谁都没记起这将是个情人节周末。多亏Amy和Jason为我们放弃两人世界,带上家里皮肤超好的小帅哥Ollie,陪我们逛开了西雅图……


小罗因为生意,经常去西雅图。但要说纯旅游,上一次就要追溯到他10岁的时候。而我,更是第一次游西雅图,于是我们感兴趣的景点都是比较popular也可以说是西雅图的“必游之地”,如西雅图水族馆、Pikes Public Market、第一个Starbucks、Space Needle、Ride the Ducks……而这类景点local的反而不太有兴趣去,就好像我从来没有过念头要去旧金山水族馆,却来了西雅图逛这里的水族馆。


西雅图不但是Starbucks的起源地,连第一家Nordstrom也开在这座城市。30秒搭乘Space Needle的电梯到达顶层观景台,西雅图市景一览无遗, 楼、海、桥、山,以及高高低低的地势,这般的景致倒和旧金山有着异曲同工之妙。


同样,和旧金山一样,西雅图的海鲜也是有名的。高档餐厅里,座面无敌海景可以享用各种精致新鲜的龙虾蟹鱼,街边小店同样可以占据海边的有利地势,海鲜的价格更为平易近人,口味也照样各有特色。最值得一提的是Amy带我们去的四川餐馆:西雅图的海鲜,配合中式的烧法,或姜葱或麻辣,始终最适合我们中国人的胃。端上桌的各种菜式简直美味到咬掉舌头都不自觉。


四天的行程匆匆而过,偌大的城市只能蜻蜓点水一带而过,但是这趟旅程中的点点滴滴都将在我的记忆中划下浓重的一笔。就像Amy说的,秀气。西雅图就是这样一个秀气灵动的地方。I like it!

2/09/2009

Ready for Seattle Trip--Tiramisu Cookies


来了美国2年,当初一起k歌、八卦、杀人的朋友们早已各奔东西,四散在美国各个角落。虽然彼此之间的距离只是一张domestic机票那么远,但是大家上班、读书、生孩子,忙得不亦乐乎。就算我,虽然什么正经的都没干,挂在嘴上说去西雅图找Amy玩似乎也说了很久,拖拖拉拉直到眼下才能成行。

Amy早就瞄上了我的甜点,可惜蛋糕那些东西是带不了了。于是很早我就开始翻书打算做两款饼干带去。一款毫无意外的是我最近的心头好--抹茶饼干,另一款就是今天第一次尝试的提拉米苏饼干。考虑到Jason是白人,未必会喜欢亚洲人普遍钟爱的抹茶口味,这个提拉米苏饼干应该是比较安全的选择。


不过话说回来,小罗倒是非常喜欢那些绿绿的抹茶饼,本来出炉的一大堆饼干分成了三份:一份送给Amy,一份自己留在路上当零嘴,还有一份留给Michael,等他周末来帮我们喂猫的时候也可以吃来打发下时间。可是一天之间,Michael那份已经见底了。幸好刚做的提拉米苏饼干有多,赶紧藏进保鲜盒留给Michael。

说到这个饼干的口味,和提拉米苏蛋糕一样有趣。单片的饼干只是脆饼而已,可是一夹上mascarpone内馅,饼干就和提拉米苏里的手指饼一样开始从松脆变为酥软的蛋糕口感。于是巧克力、咖啡酒、mascarpone,这个饼干的味道应该可以媲美原汁原味的提拉米苏蛋糕。


Tiramisu Cookies

Make 14

50g butter, at room temperature, diced

90g caster sugar

1 egg, beaten

50g plain (all purpose) flour

For the filling

150g mascarpone cheese

1 tbsp dark rum

1/2 tsp instant coffee powder

1 tbsp light muscovado (brown) sugar

For the topping

75g white chocolate

1 tbsp milk

2 tbsp crushed chocolate flakes

Steps:

1. To make the filling, put the mascarpone cheese in a bowl. Mix together the rum and coffee powder, stirring well until the coffee has dissolved.

2. Add the rum and coffee mixture and the sugar to the cheese and mix together well. Cover with clear film and chill until required.
3. Preheat the overn to 200C/400F. Line two or three baking sheets with baking parchment. To make the cookies, cream together the butter and sugar in a bowl until light and fluffy.

4. Add the beaten egg and mix well. Stir in the flour and mix thoroughly again until well combined.

5. Put the mixture into a piping (pastry) bag fitted with a 1.5cm nozzle and pipe 28 small blobs on to the baking sheets, spaced slightly apart.

6. Cook for about 6-8 minutes until firm in the centre and just beginning to brown on the edges. Remove from the oven and set aside to cool.
7. When ready to assemble, spread a little of the filling on to half the cookies and place the other halves on top.

8. Put the chocolate and milk in a heatproof bowl and melt over a pan of hot water. Take care not to overheat. When the chocolate has melted, stir vigorously to make a smooth spreadable consistency.

9. Spread the chocolate topping evenly over the cookies, then sprinkle with crushed chocolate flakes to finish.


提拉米苏饼干


份量14块

50g 奶油,室温放软

90g 糖

1个蛋,打散

50g 面粉

夹馅

150g 马斯卡彭芝士

1 tbsp 深色朗姆酒

1/2 tsp 速溶咖啡粉

1 tbsp 黑糖

饼干顶部装饰

75g 白巧克力

1 tbsp 牛奶

2 tbsp 巧克力碎

步骤:

1. 做夹馅:马斯卡彭芝士室温软化。把朗姆酒和咖啡粉混合搅拌至咖啡粉溶化。

2. 把咖啡酒液和黑糖加入芝士,拌匀,盖上保鲜膜,备用。

3. 预热烤箱至200C/400F,准备2-3个烤盘里铺烤盘纸。混合奶油和糖,打至呈羽毛状。

4. 打散鸡蛋,加入奶油和糖的混合物拌匀。拌入面粉,轻柔搅拌均匀。

5. 裱花袋装上1.5厘米的圆形光滑管嘴,将面糊装进裱花袋,在烤盘纸上有间距得挤出28个圆形。(每个饼干面糊挤大约直径2.5cm即可,出炉后的饼干会涨至直径5cm,所以烤盘上的间距要预留足够)

6. 烤6-8分钟,至饼干中间变硬,周围略泛黄色即可。放凉备用。

7. 准备组装饼干的时候,在一块饼干上铺一层馅料,盖上另一块饼干。

8. 在平底锅里烧开一英寸高的开水,熄火。将白巧克力和牛奶放入一个耐热的碗里,不停地搅拌巧克力,隔水加热至巧克力融化光滑。

9. 将白巧克力溶液小心得铺在饼干最上层,撒上巧克力碎块。


2/04/2009

暖暖的Creamy Rice Pots--颠覆甜品的罪恶感


很多人都视甜品为身材和体重的大敌,我却不以为然。有摄入就得消耗,如果运动健身可以成为生活方式的一种去享受它,自然也可以尽兴享受各种甜品。

如果好像小罗一样忙得除了周末之外,完全没空健身又Sweet teeth的话,这款Low-fat的Creamy Rice Pots无疑可以减轻不少来自甜品的罪恶感。

新鲜出炉的奶羹,翻开最上面一层烤到金黄的甜杏仁,糯糯的米粒饱含着浓郁温暖的奶味,且拌着新鲜橙子和柠檬的果屑。低脂又美味,绝对是既饱口福又不用担心身材的不二选择。


Creamy Rice Pots

Fat per serve: 3.5 g
Preparation time: 15 minutes
Total cooking time: 1 hour 10 minutes
Serve 4

1/2 cup short-grain rice
1 litre skim milk
1/4 cup caster sugar
1 tsp grated orange rind
1 tsp grated lemon rind
1 tsp vanilla essence
20 g hazelnuts
1 tbsp soft brown sugar

1. Wash the rice in a sieve under cold water until the water runs clear, then drain thoroughly.

2. Put the milk and sugar in a pan and stir over low heat until the sugar has dissolved.

3. Add the rice and rind and stir briefly. Bring to the boil and reduce the heat to as low as possible. Cook for 1 hour, stirring occasionally, until thick and creamy and the rice is tender. Stir in the vanilla essence.

4. Spread the hazelnuts on a baking tray and toast in a moderate 180C//350F oven for about 5 minutes.

5. Rub the hot nus in a tea towel to remove as much of the skin as possible. Cool and grind in a food processor to a coarse texture, not too find. Preheat a grill to very hot.

6. Spoon the rice into four heatproof 185ml ramekins. Combine the sugar and ground hazelnuts and sprinkle over the rice.

7. Grill briefly until the sugar melts and the nuts are lightly browned. Serve immediately.

果奶米羹

1/2 cup 短粒大米
1升低脂奶
1/4 cup 糖
1 tsp 橙子皮屑
1 tsp 柠檬皮屑
1 tsp 香草精
20g 烤过的杏仁片(原食谱用的是生榛子,做法可参照英文食谱)
1 tbsp 红糖

1. 米用冷水洗净,沥干。

2. 小锅里加入牛奶和糖,低温加热直至糖融化。

3. 在小锅中加入洗净的米和橙子、柠檬的皮屑,搅拌。烧开后调到最低火继续煮一个小时,偶尔搅拌直至奶液变厚,米粒烧软,加入香草精。

4. 烤箱180C/350F预热。完成的米饭盛入4个烤箱用碗或杯。混合红糖和杏仁片撒在米饭上,进烤箱烤15-20分钟至红糖融化,杏仁变色即可。稍放凉立刻食用。

2/02/2009

偷懒而成就的Mascarpone Trifle


第一次做Tiramisu的时候,辛苦地遍寻手指饼。于是在TJ's看到新上市的手指饼就立刻屯了2盒。不过看到这个Mascarpone Trifle的食谱,立刻改变了我再做Tiramisu的打算。

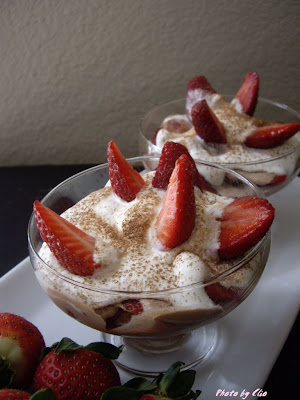
说起这Trifle,或可译作蛋糕布丁,历史可追溯至文艺复兴时期,是一款经典的英式冷冻甜品。Trifle一词,来自法文的“松露/块状”,意思是没什么大不了的事。它是由一层淋泡过甜酒的蛋糕,再加上一层Custard、水果和打发的奶油组合而成。层层叠叠的蛋糕本身看起来就非常诱人,各家不同的食谱又蕴含了不同的食材,足以满足不同人的喜好。至于口味么,就这个Mascarpone Trifle来说,从最上层往下满满一勺子,混合了甜酒的淳、巧克力的香浓、草莓的清甜……


虽然Trifle一贯漂亮得让人一见就很有冲动想立刻尝试做来吃,但是因为要另外做一片海绵蛋糕,无奈懒惰的我一直抗拒着不愿动手,只限于看着Trifle的图片流口水。因为手指饼是一向用来配合Mascarpone做Tiramisu的,所以最终看到了这个Mascarpone Trifle,终于让我顺理成章地用手里现成的手指饼去替代原方里的海绵蛋糕,这才最终成就了这个甜品。

Mascarpone Trifle--Recipe from THE ESSENTIAL DESSERT COOKBOOK

Preparation time: 40 minutes + chilling
Total cooking time: 10 minutes
Serves 4-6

175g plain sponge cake
1/2 cup Tia Maria or Kahlua
70g dark chocolate, grated
500g strawberries, hulled
cocoa powder and icing sugar, to dust

Custard
4 egg yolks
2 tbsp sugar
2 tsp cornflour
1/2 cup cream
1/2 cup milk
2 tsp vanilla essence
1 1/3 cups cream, extra
250g mascarpone

1. Cut the cake into chunks and put in the base of a 1.75 litre dish.

2. Spoon the liqueur over the cake and sprinkle with half the grated chocolate.

3. Slice a third of the strawberries and sprinkle over the top. Cover and refrigerate.

4. To make the custard, whisk together the yolks, sugar and cornflour until thick and pale.

5. Heat the cream and milk in a pan until almost boiling, then gradually whisk into the yolk mixture.

6. Pour into a clean pan and return to low heat, until the custard thickens and coasts the back of a spoon.

7. Remove from the heat and stir in the vanilla essence and remaining grated chocolate until smooth. Cover the surface with plastic wrap, to stop a skin forming , and allow to cool.

8. Whip a third of the extra cream until soft peaks form and gently fold this and the mascarpone into the cooled custard.

9. Spoon over the cake and strawberries, cover with plastic wrap and then refrigerate until needed.

10. When you are ready to serve, whip the remaining cream until stiff peaks form and spoon over the trifle. Cut the remaining strawberries in half and arrange on top. Dust with a mixture of cocoa powder and icing sugar to serve.


马斯卡彭蛋糕布丁(食谱摘自the essential dessert cookbook)
4-6人份

175g 海绵蛋糕
1/2 cup 天万利或咖啡蜜酒
70g 黑巧克力,切碎片
500g 草莓
可可粉和糖粉,装饰用

卡士达
4个蛋黄
2tbsp 糖
2tsp 玉米淀粉
1/2 cup 鲜奶油
1/2 cup 牛奶
2tsp 香草精
1 1/3 cups 鲜奶油,额外
250g 马斯卡彭芝士

1. 根据杯子底部的尺寸,切一片蛋糕垫在杯底。

2. 用勺子将甜酒倒在蛋糕上让其吃透,再将一半量的黑巧克力撒在蛋糕上。

3. 将1/3量的草莓切片,铺在巧克力层上,盖上保鲜膜,冷藏。

4. 用电动搅拌机打匀蛋黄、糖和玉米淀粉,直至变厚,颜色变浅。

5. 在小锅里加热鲜奶油和牛奶,在即将沸腾前离火,慢慢加入蛋黄液中。

6. 将蛋黄奶液倒入一个干净的小锅,继续小火加热至卡士达变厚。

7. 将卡士达离火,加入香草精和剩余的黑巧克力,搅拌至光滑。盖上保鲜膜,让其冷却。

8. 额外的鲜奶油中取1/3稍微打发,和马斯卡彭芝士一起轻柔地拌进冷却的卡士达里。

9. 将完成的卡士达盛入容器内的草莓上,盖上保鲜膜,冷藏。

10.在吃之前,将剩余的2/3的鲜奶油硬性打发,盛在蛋糕顶部,草莓切块装饰。筛上可可粉和糖粉的混合,装饰。